BUILD AN ADIRONDACK CHAIR WITH OUR DIY PROJECT PLAN
Cupholder Hack
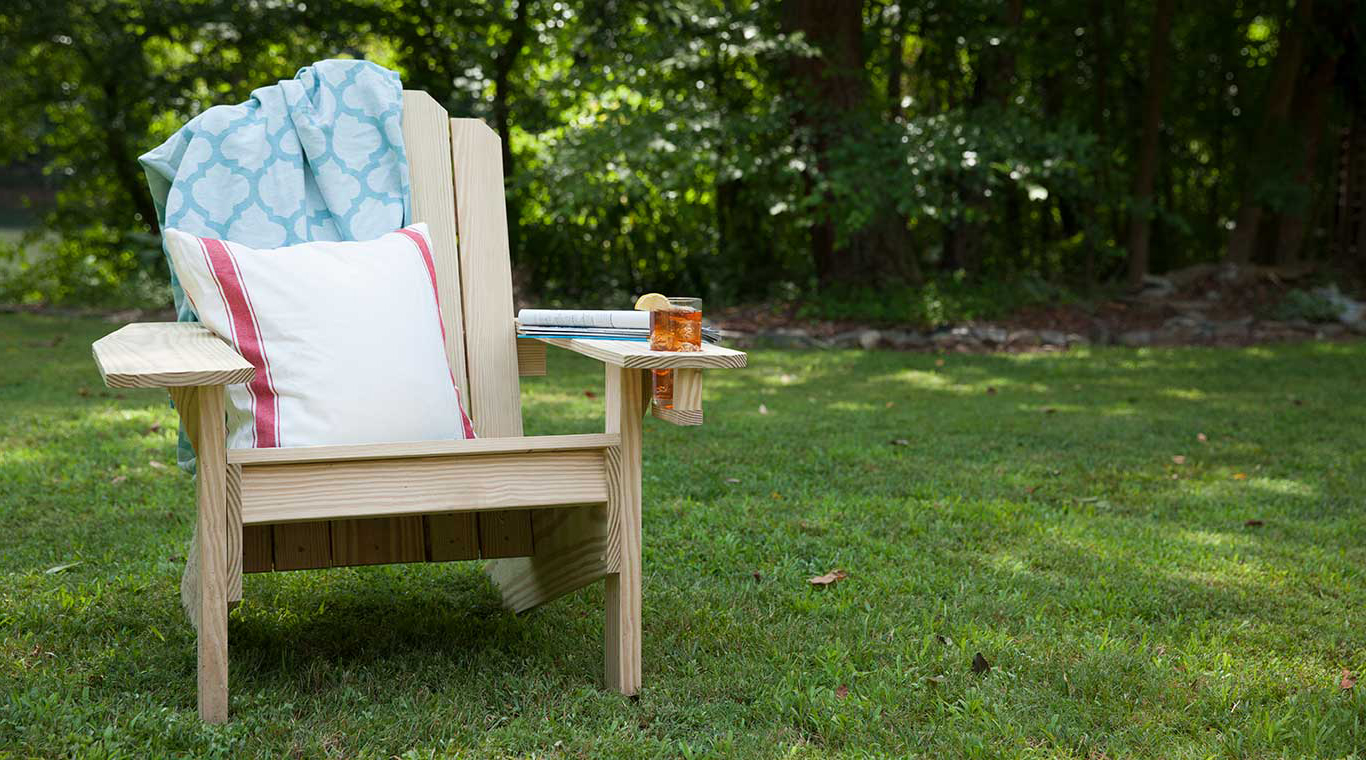
Our free Adirondack chair plan makes a beautiful chair for your patio, porch, deck, or garden that will look great and be a comfortable place to sit and enjoy the outdoors.
There are many variations of the classic Adirondack chair. The signature piece of our Adirondack furniture suite, this version features classic lines and angles that uses straightforward construction and common materials.
Building a wood Adirondack chair is a fairly simple project. It doesn't demand a lot of time and is easy on the budget. With our DIY plan, you'll learn how to build an Adirondack chair that can be completed in one weekend, while providing years of comfortable seating.
Before you get started, please read our info on safety, fasteners and building tips.
Before building, please consult our Terms of Use.
Adirondack Chair
Getting Started
Materials
- (4) 1 x 4 x 8' YellaWood® brand pressure treated pine
- (2) 1 x 8 x 8' YellaWood® brand pressure treated pine
- (1) 2 x 4 x 10' YellaWood® brand pressure treated pine
- 1 1/4" deck screws
- 2" deck screws
- 3" deck screws
- Waterproof wood glue
- YellaWood Protector® Stain and Sealer
Tools
- Miter saw
- Table saw
- Jig saw (or hand or circular saw)
- Drill/driver
- Clamps
- 1/6" drill bit
- Damp rag to wipe up excess glue
Plan Preview
ADIRONDACK CHAIR PLAN PREVIEW
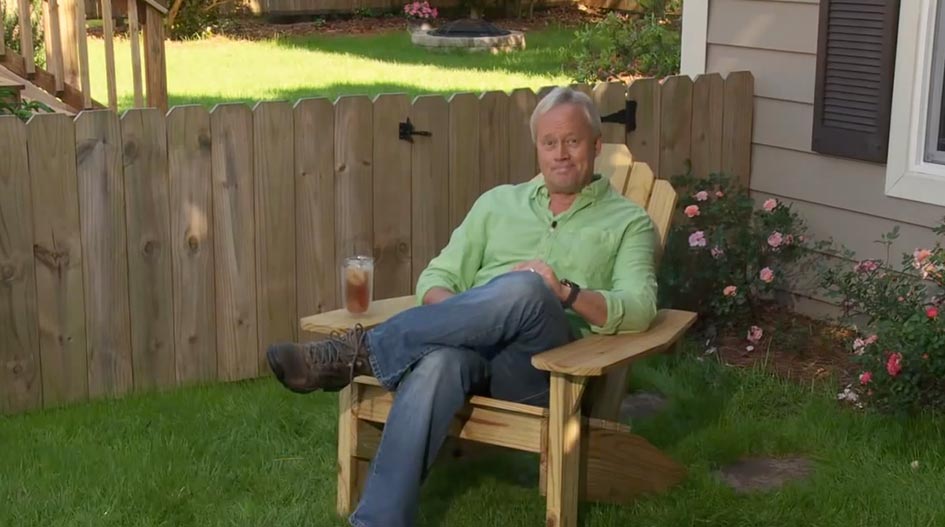
Make some new seating by following this YellaWood® step-by-step Adirondack Chair plan. This project also has the option to add in a convenient cupholder. Take a quick look at the steps involved in creating your outdoor chair.
A summary of the steps is shown below:
1 Prep. Gather listed tools, supplies, and refer to cut list prior to beginning project.
2 Cutting & Securing Pieces. Use a jig saw or circular saw to cut the back legs and seat stretchers to length and attach them with screws. Cut out the arms and make appropriate markings. Drill 1/8” pilot holes.
3 Clamping & Creating Support. Clamp back support in place. Trim pieces to make braces and attach them to the front legs. Measure up from bottom of the front legs and mark at 16”. Clamp on and screw the back leg/stretcher assembly to the front leg arm assembly.
4 Build the Back & Seat. Cut the rest of the pieces as specified. Lay out back slats and secure them together with two back stretchers. Attach the back slat assembly to the back seat stretcher. Drill pilot holes in seat slats and back legs. Put the seat slats on the chair and screw them in. Reattach arm assembly and repeat for other side.
5 Finishing. Break all edges and sand all surfaces smooth before applying waterproof finish according to manufacturer instructions.
Cupholder Hack
Hack Materials
- (1) 1 x 2 x 8' YellaWood® pressure treated pine
- 15/8" wood screws ~ ½ lb. box
- Preferred wood finish
Hack Tools
- Miter saw
- Drill/driver
- Combination countersink bit (with 2" long 1/8" bit)
- 3 1/4" hole saw
- Radial sander
- Measuring tape
- Carpenter framing square
- Pencil
- Damp rag to wipe up excess glue
- Waterproof wood glue
Hack Plan Preview
An optional add on to the Adirondack chair is a cupholder for your drinks! Follow the guide to take your chair to the next level in a few easy steps.
A summary of the steps is shown below:
1 Hole Cut-Out. Choose the arm you’d like the cup holder to be placed on. Measure 3” from the front edge of the arm. Cut out a hole using a 3 1/4” hole saw.
2 Assembly. Create a C-shaped assembly with three pieces cut from the 1x2 stock. Use a square to maintain a 90-degree angle. Center the cup holder support underneath the hole and attach using screws.
3 Finishing. Ease any sharp edges using a radial sander or sanding block with medium grit. Apply preferred finish to the wood.