DIY BIG GREEN EGG® TABLE PLAN
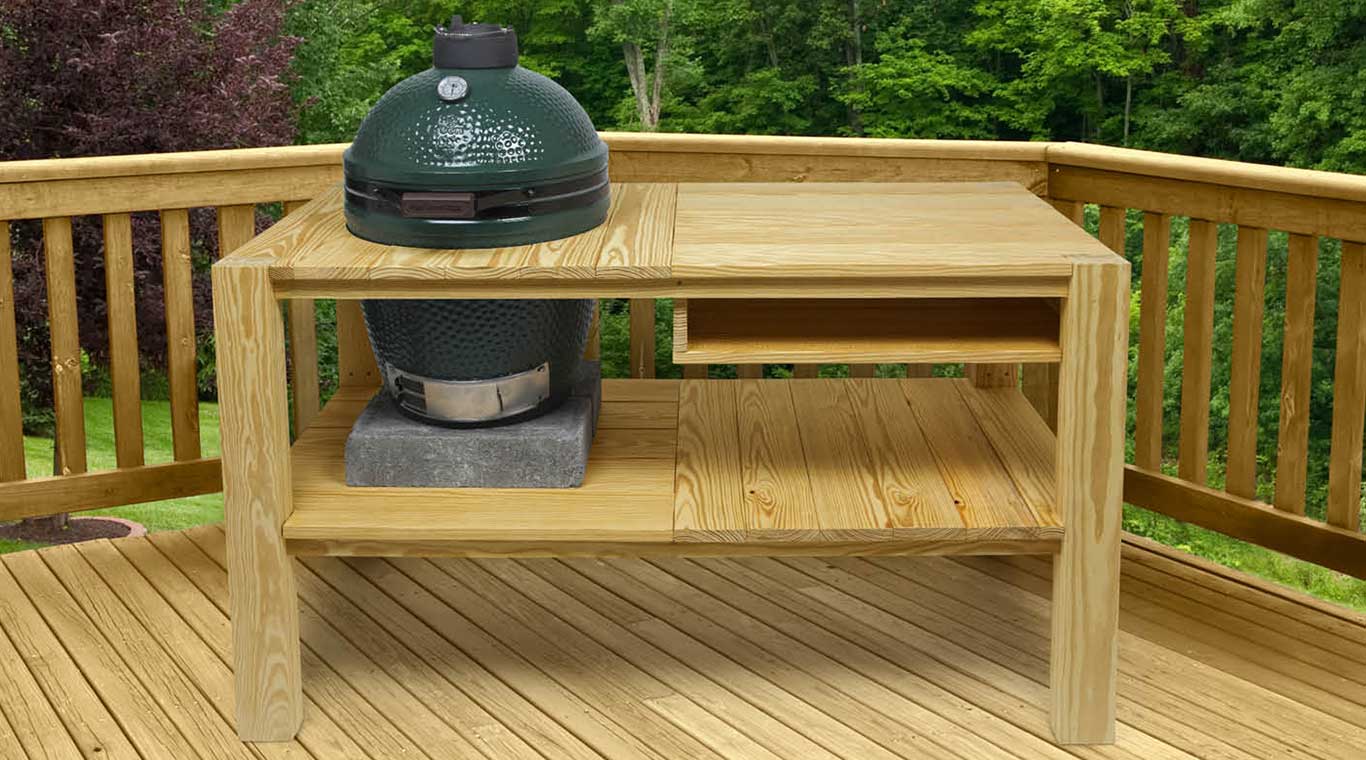
Build a Big Green Egg table and smoke in style.
Be ready for summer grilling, smoking, roasting and more. In just six simple steps, you can create a custom-built Big Green Egg table with extra space for equipment storage and meal prep. This sturdy DIY Big Green Egg table plan from YellaWood® features a shallow, built-in shelf for tongs, gloves, grate lifters, or any other grill tools. The legs are thin planks laid up to maximize strength while remaining sleek. Download our Big Green Egg table plan and visit your local YellaWood dealer to get started today.
Important information while building the Big Green Egg table:
Make sure to take proper safety precautions including always wearing gloves, goggles and a dust mask when you're cutting or sanding. Before you get started, please read our info on safety, fasteners and building tips.
- Use fasteners and hardware that are in compliance with the manufacturer’s recommendations and the building codes for their intended use.
- If the Big Green Egg table will be placed in constant, repetitive or long periods of wet conditions, only stainless steel fasteners should be used.
- Do not use treated wood in applications where trapped moisture or water can occur.
- Wash exposed skin areas thoroughly.
- All sawdust and construction debris should be cleaned up and disposed of after construction.
- Do not burn preserved wood because it could release toxic chemicals.
More information can be found on pages 34 and 35 of the downloadable DIY Big Green Egg table plans.
Note: Big Green Egg® is a registered trademark of Big Green Egg, Inc.
Before building, please consult our Terms of Use.
What you’ll need to build a custom DIY Big Green Egg table:
Materials
- (5) 5/4 x 6 x 16' YellaWood® brand pressure treated pine
- (1) 2 x 4 x 6' YellaWood® brand pressure treated pine
- (3) 1 x 4 x 12' YellaWood® brand pressure treated pine
- (1) 1 x 4 x 20' YellaWood® brand pressure treated pine
- (1) 1 x 4 x 6' YellaWood® brand pressure treated pine
- 1-1/4" flat-head deck screws (1 lb box)
- 2" flat-head deck screws (1 lb box)
- 18-gauge 1-1/2" nails (approx. 30)
- 18-gauge 1" nails (approx. 30)
- (1) Metal tie plate (16-gauge 3 x 7")
- (10) #8 1-1/4" Wafer wood screws (for tie plate)
- (1) 15" x 15" concrete paver
- YellaWood Protector® Stain and Sealer
Tools
- Miter saw or circular saw
- Table saw
- Drill/driver
- Nail gun
- 1/8" Countersink drill bit
- Carpenter framing square
- Jigsaw
- Clamps
- Wood glue
- Measuring tape
- Damp rag to wipe up excess glue
Plan Preview
BIG GREEN EGG TABLE PLAN PREVIEW
The DIY Big Green Egg table plan includes easy-to-follow instructions with corresponding pictures to ensure a smooth process. Find a summary of the steps below:
- Construct the frame starting with the legs. Using a miter square as you construct the legs can help ensure future steps align. It may be helpful to assemble on the floor.
- Assemble the shelf and brace supports. Gluing the edges along the way helps keep parts connected before you secure permanently. Create the shelf upside down – then flip and slide into supported frame.
- Lay out the lower and upper surface planks. Start with the back-left corner of the lower decking.
- Cut out the circle to fit the Big Green Egg®. Plans show the diameter for a 15”-wide Medium-sized Egg. Use a compass and jigsaw to measure and cut. If you don’t have a compass, check out the plan for tips to use a piece of scrap wood instead.
- Sand and finish. Ease sharp edges with a medium grit sanding block and apply preferred finish to the wood. (We recommend an annual application of water repellent, but you can also stain or paint. Then, you’re ready to grill in style all summer long with your new, custom Big Green Egg table.