
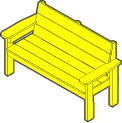
DIY Wooden Garden Bench
Create a relaxation destination with our simple garden bench plan.
Reward your hard work in the garden with a comfortable spot to relax and enjoy the beauty of it all. This DIY garden bench project is simple, versatile and only takes three hours to complete – so you’ll be building on Saturday in time to rest and relax on Sunday. The 51” wide and 16” tall dimensions for our wooden garden bench create a comfortable loveseat suitable for any spot in your garden. And you may not want to stop there. Check out YellaWood® bench plans for a Lazy Bench, Tree Bench, Convertible table and Adirondack Chairs, so you can build outdoor seating for any occasion.
Made entirely from dimensional lumber and with only simple cuts and butt joints, the YellaWood® wooden garden bench plan brings DIY satisfaction as well as a comfortable seat. Download the plan and learn how to build a garden bench that can go around the firepit, by the swing set, or overlooking your favorite view. Stained or painted, these beautiful DIY garden benches make excellent gifts or a stunning addition to the community garden.
Before you get started, please read our info on safety, fasteners and building tips. Before building, please consult our Terms of Use.
How to build a garden bench: Video
Materials
- (6) 1 x 6 x 8' YellaWood® brand pressure treated pine
- (5) 2 x 4 x 8' YellaWood® brand pressure treated pine
- (1) 2 x 6 x 8' YellaWood® brand pressure treated pine
- 2" deck screws
- 2 1/2" deck screws
- 3" deck screws
- Waterproof wood glue
- YellaWood Protector® Stain and Sealer
Tools
- Miter saw (or circular or hand saw)
- Jig saw
- Drill/driver
- 1/8" drill bit
- Clamps (2)
- Damp rag to wipe up excess glue
Plan Preview
DIY GARDEN BENCH PLAN PREVIEW
Get a sneak peek into how to build a garden bench. The trickiest part may be laying out and cutting the arms – but we walk you through it. In our garden bench plans we cut and sanded a round arm profile, but you can play with the design to whatever suits your style.
- Cut the seat frame and arrange it keeping the outside of the frame ends flush with the ends of the front and back frame. Pilot holes are recommended, and you may find clamps useful as well.
- Measure and mark the center of the frame. Measure from both the front and back so it’s centered – you might even want to place some 2x scrap on the mark so you know where it is as you attached the stretchers.
- Layout and cut back supports. There is a detailed drawing of this step in the downloadable garden bench plan.
- Cut and attach arm and leg supports. When it’s time to add the arms, keep the back flush with the edges of the back legs and make sure you have about a 3/4-inch overhang on the front.
- Sand and finish. Sand all edges and apply a weatherproof finish to extend the lifetime of your wooden garden bench.