HOW TO MAKE A PICNIC TABLE
Drink Trough Hack
Sure to be a gathering point, this roomy table features seating for up to eight adults with separate benches for unencumbered legroom. Use these free picnic table plans to build a picnic table for your backyard, deck, or any other area around your home where you need seating. Building a picnic table is an easy task that makes the perfect weekend project without breaking the bank.
Start by constructing the table and bench tops, followed by the leg systems. The half-lap joints on the legs are easy to create and add a touch of charm.
A final sanding and coating of protection will have this table ready for action.
An easy weekend project, it won’t be long until this table becomes the center of most backyard festivities.
Before you get started, please read our info on safety, fasteners and building tips.
Before building, please consult our Terms of Use.
Picnic Table
Materials
- (10) 2 x 6 x 8' YellaWood® brand pressure treated pine
- (5) 2 x 4 x 10' YellaWood® brand pressure treated pine
- (1) ½ lb. box of 1¼" wood screws + appropriate bit
- 4" heavy-duty wood lag screws (1 box, approx. 70 screws)
- (12) ¼" x 3½" carriage bolts (galvanized)
- (6) ¼" x 4½" carriage bolts (galvanized)
- (18) ¼" washers and nuts (galvanized)
- (12) 2" x 5" corner tie-plates
- (72) ¼" Phillips pan-head screws + Phillips driver bit
- Preferred wood finish
- YellaWood Protector® Stain and Sealer
Tools
- Pencil
- Measuring tape
- Miter saw (or chop saw)
- Combination countersink bit (with 1/8" bit)
- Drill/driver
- Clamps (two at least 5' long)
- Chisel or file
- Hammer
- Socket wrench (with a 7 /16" bit)
- 3/16" & 1/4" Drill bits
- 1/2" & 1" Forstner bits
- Hex driver bit
- Radial sander (or sanding block)
Plan Preview
PICNIC TABLE PLAN PREVIEW
Use this YellaWood® step-by-step guide to build a picnic table and benches at home. This build also has a hack for creating an ice trough. See below for a summary of how to build the picnic table and benches.
A summary of the steps is shown below:
1 Prep. Cut all parts listed to specified lengths. Label all parts.
2 Top Surfaces. Lay out six of the listed parts using spacers. Tighten with a 5’ bar clamp. Place specified part at either end of the table 8” from the ends, and drill and secure according to the instructions. Repeat on other end of the table. Arrange parts needed for the bench top and countersink and secure with screws on both sides of the bench. Following the same steps, make a second bench top.
3 Leg Assemblies. Make an “X” with the specified parts and mark one of the legs on both sides. Set depth of miter saw blade to half of the board’s thickness and saw through the wood at half depth. Chisel or file the ridges of the saw blade marks. Ensure it is a good fit with the other leg. Secure with two screws. Repeat with all other specified parts.
4 Assembly. Center a table leg assembly on the outside of the brace and secure with a clamp. Drill holes and add in a carriage bolt on both sides of the leg. Tap them into place with a hammer. Secure the bolts with washers and nuts. Repeat steps to assemble the other table leg. Add the brace, centered within the “X”, and drill holes according to the instructions. Use bolts to secure, along with washers and nuts. Repeat for the table and benches. Secure 90-degree tie-plates at the other end of the brace. Do the same process for the bench seats.
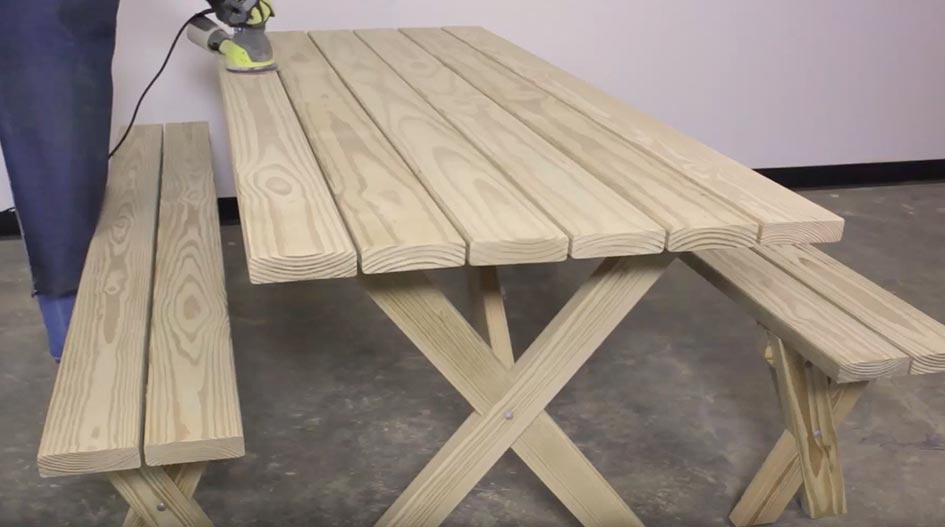
5 Finishing. Ease any sharp edges using a radial sander or sanding block with medium grit. Apply preferred finish to the wood.
Drink Trough Hack
Hack Materials
- (2) 1 x 8 x 8' YellaWood® brand pressure treated pine
- (3) 1 x 4 x 10' YellaWood® brand pressure treated pine
- Phillips bit to remove pan-head screws
- 1¼" wood screws + appropriate bit
- 1⅝" wood screws + appropriate bit
- 1⅛" rubber stopper
- 14" roll of roof flashing
- Tube of construction cement
- Tube of silicone caulk
- Preferred wood finish
Hack Tools
- Pencil
- Measuring tape
- Miter saw (or chop saw)
- Table saw
- Jig saw
- 1 1/8" Forstner Bits
- Drill/driver
- Clamps
- Combination countersink bit (with 1/8" bit)
- Hammer
- Socket wrench (with a 7/16" bit)
- Hex driver bit (fits lag screw head)
- Metal snips
- Radial sander (or sanding block)
- Rag (to wipe up caulk and adhesive)
- Pocket screw jig (optional)
- Caulk gun
Hack Plan Preview
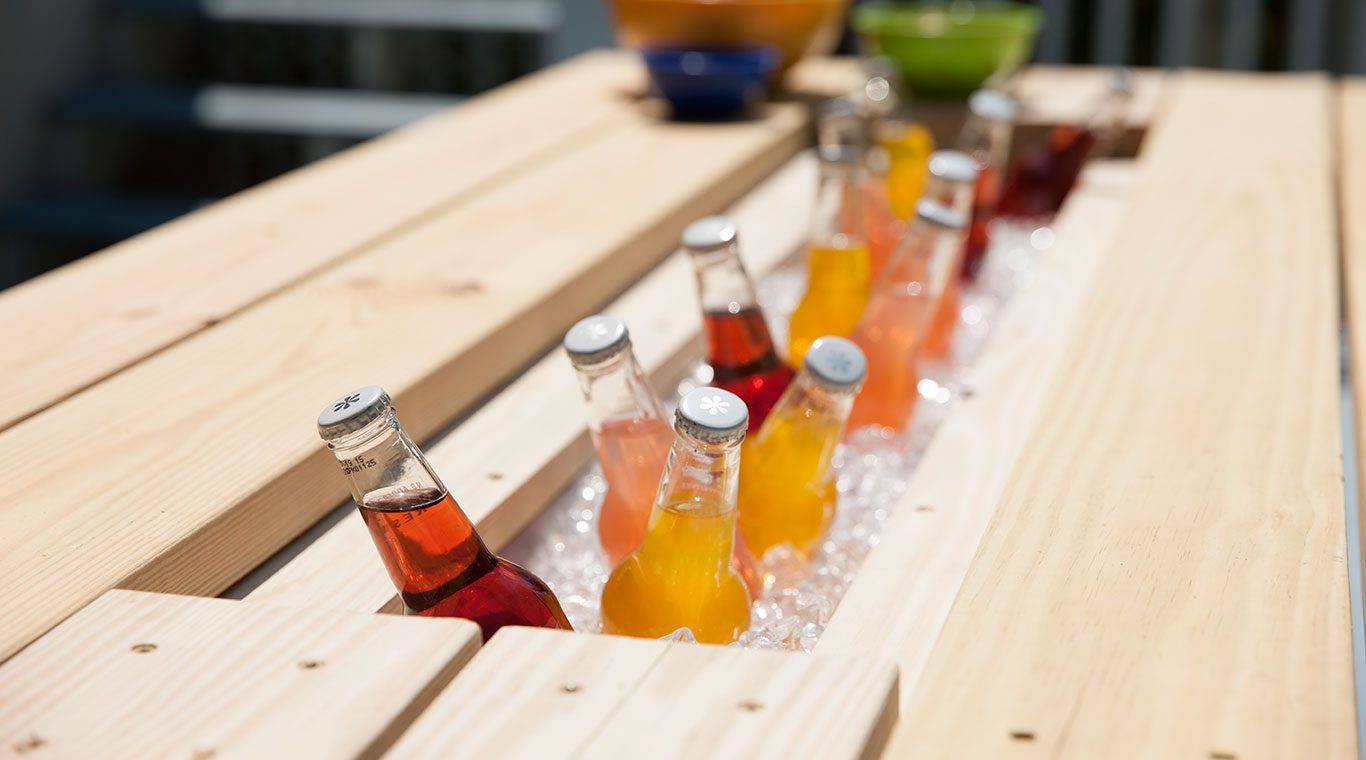
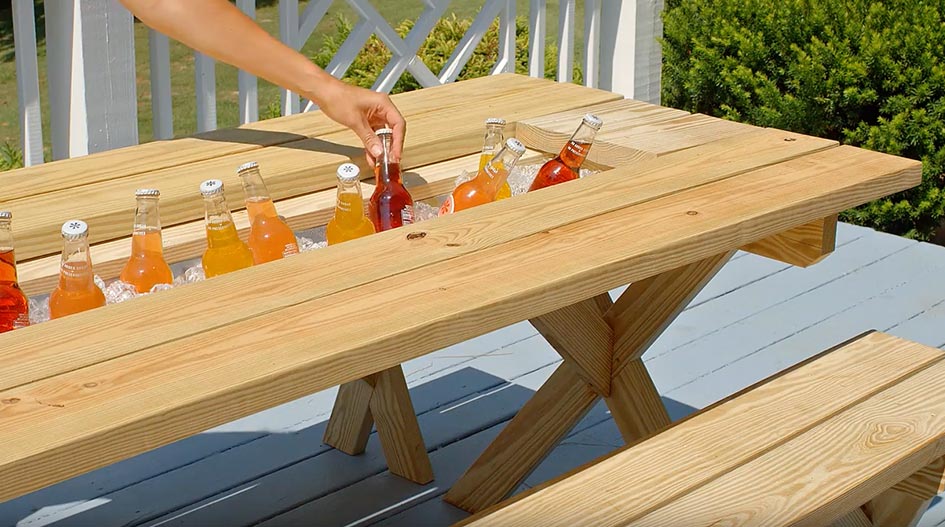
This trough adds sophistication to a casual table, and its angled walls allow for bottles to lay elegantly. With ice and a removable plug, it can be used to keep drinks cool during an entire event.
A summary of the steps is shown below:
1 Creating the trough. Remove angle braces and the two center boards from the table. Assemble parts of the trough using claps and screws. Measure and cut roof flashing to fit in the trough, and adhere roof flashing to the trough.
2 Attaching the trough. Create a lid using parts removed at the beginning. Flip the picnic table over and attach the tough to the picnic table. Add new parts outside of the leg assemblies. Flip the picnic table upright and add the plug and lid to the trough.